How To Install Underlayment Featured

How to lay underlayment for laminate flooring

Underlayment plays a very important role when installing your new flooring. Underlayment reduces sound, provides cushion, and even provides moisture protection. This is why it is crucial that you install your underlayment correctly. This is a step-by-step guide that will cover everything you need to know when laying your underlayment.

Supplies Needed:

  • Compatible Underlayment for Your Floors
  • Hammer
  • Nails and Screws
  • Tape Measure
  • Screw Driver
  • Sticky Tape
  • Utility Knife
  • Scissors
  • Broom/Vacuum Cleaner

Step 1: Remove Old Flooring

To start, you will want to completely remove your existing flooring. You will also want to remove any underlay underneath. Old underlayment will not have the compression resistance that it used to, so it is better to install new underlayment every time you install a new floor. If you remove carpet, the carpet pad will not work as underlayment, it is too thick for laminate flooring.

Next, you will need to remove any existing base board (wall base), including any quarter round molding. If you want to keep the baseboard and your drywall in good shape check out this video.

Step 2: Prepare Your Subfloor

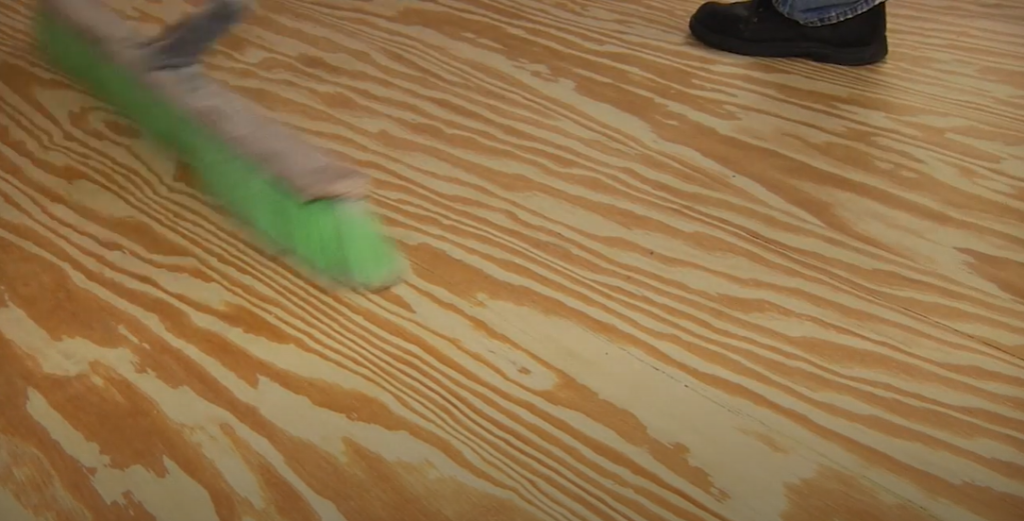
This is where your vacuum or broom will come into play. You will want to use either one to clean your subfloor of any dirt and rubble that may be left over.

Inspecting your subfloor is a very important process. Make sure that your subfloor is flat, doesn’t have any major flaws, and is dry.

If you noticed any issues with your subfloor, it is best to adress them right away. Some common issues you will want to fix are low areas, creaking areas, sticking out nails must be removed or fixed, and etc. Your subfloor is very important because it will be what is supporting your new flooring the most.

Sub-floor Prep

Step 3: Unroll The Underlayment

Start laying next to a wall, you will want to lay the underlayment along the direction you are planning to lay your flooring. Different underlayments all have slightly difference instructions on how to install them. Make sure to check the instructions to see if you need to leave a gap between the wall and the underlayment. When you reach the other end of the room cut the underlayment to size.

Roll Out the Underlayment

Step 4: Tape Rows

You will want to tape the rows together with the pre-attached adhesive. If your underlayment doesn’t have pre attached adhesive you will want to use underlayment tape, but duct tape works just fine too. Some people like to use tape over the pre-attached adhesive just to have an extra layer of protection.

Tape Rows

Step 5: Finish Covering the Floor

As you cover the floor, make sure the sheets butt right up against each other. Make sure the underlayment itself does NOT overlap though. This will make the surface uneven and cause problems later on. Don’t forget to leave small gaps between the underlayment and the walls if your manufacturer requires it.

Press Rows Together

Step 6: Trim Excess Underlayment

Use your utility knife to remove any underlayment over any vents or corners that don’t lay nicely. Preparing for what you will have to cut can make the process go quicker and more smoothly.

Trim Excess Underlayment

Step 7: Continue to the Flooring

Once you have your underlayment successfully installed, you are ready to move onto installing your flooring.

Install your Flooring
Leave a Reply

Physical Address

304 North Cardinal St.
Dorchester Center, MA 02124